
Label sizes: standard dimensions & how to choose
"What size should my label be?" is usually the first question in a label project — and the honest answer is that the container decides, not a standards body. Here are the common size families, how to measure for them, and the fit rules that matter.
THE SHORT ANSWER
There is no single standard label size. Label dimensions are set by the container they go on, so the industry has converged on common size families per application rather than fixed standards. The ones worth knowing:
- Shipping labels — 4 × 6 in is the near-universal thermal-printer format
- Round jar lids — 2, 2.5, and 3 in circles are typical
- Bottle wraps — sized from the container: circumference minus a small seam gap × the straight wall height
- Address labels — 1 × 2.625 in is the classic 30-per-sheet layout
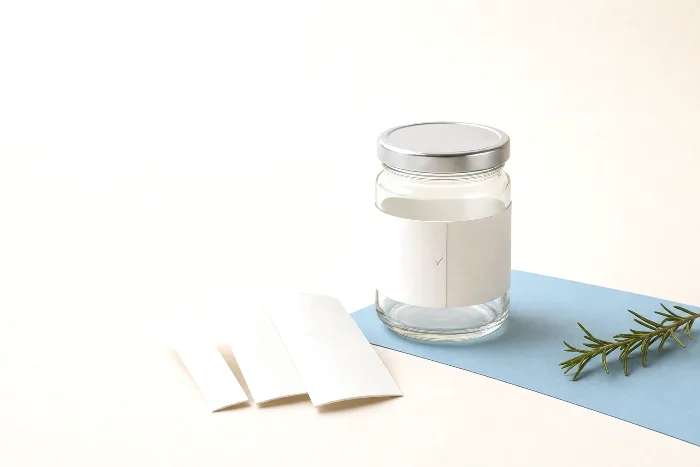
To size a wrap label yourself: measure the diameter, multiply by π (≈3.14) to get the circumference, and subtract a small gap so the ends don't collide at the seam.
Why there's no single standard label size
Paper has ISO 216 and letter/legal. Corrugated has FEFCO codes. Labels have — nothing equivalent. A label's job is to fit a specific container, and containers come in effectively unlimited shapes and sizes, so no standards body has ever pinned label dimensions down. What exists instead is convergence: a handful of size families that show up over and over because the containers they serve are themselves semi-standardized — straight-sided jars, common bottle formats, thermal printer media, and sheet-label layouts that divide a letter page evenly.
That distinction matters practically. If you're printing shipping labels, buy 4 × 6 in media and move on. If you're labeling a product container, start from the container's measurements — the "standard" sizes are a useful sanity check, not a menu you must order from. Label converters cut custom sizes every day; this is a core theme of the complete guide to label printing, which covers where size decisions sit in the wider process.
Common label sizes by application
The table below lists the sizes we see most often. Treat every entry as typical, not mandatory — each application also runs plenty of custom dimensions.
| Application | Common sizes (in) | Shape |
|---|---|---|
| Round jar lids | 2, 2.5, 3 diameter | Circle |
| Bottle wraps (8–16 oz) | ~7 × 2.25, ~8 × 2.5, ~9 × 3 | Rectangle (rounded corners) |
| Candle jars | 3 × 3, 3.5 × 3.5 | Square or circle |
| Shipping | 4 × 6 | Rectangle |
| Address | 1 × 2.625, 1.33 × 4 | Rectangle (rounded corners) |
| Barcode / SKU | 1 × 1.5, 1 × 2 | Rectangle |
| Tamper bands / seals | ~0.5–1 tall × 2–7 long (varies with neck) | Narrow strip |
A few notes on where these numbers come from. The 4 × 6 shipping label is the media size that desktop thermal printers and carrier systems standardized around, which makes it the closest thing labels have to a true standard. The 1 × 2.625 address label is common because thirty of them tile a letter sheet exactly. Jar-lid circles cluster at 2–3 in because those are the flat areas on common lid diameters. And bottle-wrap sizes are approximate by nature — they're derived from the bottle, which is why the next section matters more than the table.
How to measure a container for a label
Sizing a label for a real container is a five-minute job with a tape measure or calipers. The steps:
- Find the straight wall. Identify the portion of the container that is vertical and constant in diameter — no shoulder curve, no base taper, no embossing. That zone sets your maximum label height. Stay a little inside it at top and bottom so the label never rides onto a curve.
- For a wrap: convert diameter to circumference. Measure the diameter and multiply by π (≈3.1416). A 3 in diameter jar has a circumference of about 9.42 in. If you can wrap a flexible tape or a strip of paper around the container instead, even better — that measures the true circumference directly, including any out-of-roundness.
- Leave a gap at the seam. A partial-wrap label should be cut a bit shorter than the full circumference — a gap of roughly 1/8 to 1/4 in between the label ends is typical — so application tolerance never stacks the two ends into a collision. If you want a deliberate overlap instead (common on tamper bands and some full wraps), plan it: the overlapping end covers artwork, so keep that zone clear of critical content.
- For a flat panel: inset from every edge. On a box, tube, or flat-sided bottle, measure the panel and keep the label comfortably inside it — a visible margin on all sides reads as intentional, while a label that runs within a hair of a panel edge or a seam reads as a placement error the moment application drifts. Never run a pressure-sensitive label across a box seam or closure unless it is specifically a seal.
- Check the label height against the wrap. Tall labels on small-diameter containers are the classic fit trap; more on that under curvature below.
Full wrap, partial wrap, or front-and-back
Once you know the circumference, you have three ways to spend it:
- Full wrap. One label covering the whole circumference, ends butted near-flush or deliberately overlapped. Maximum billboard and room for regulatory copy, but the seam is visible somewhere, and the longer the wrap the more any application skew shows up as a spiral by the time the ends meet.
- Partial wrap. One label covering most of the circumference with a designed gap — often placed at the "back" of the container. Slightly smaller, more forgiving to apply, and the gap absorbs tolerance. This is the workhorse choice for jars and bottles.
- Front-and-back. Two smaller labels: brand panel on the front, information panel on the back. Two applications instead of one, but each label is small, flat-ish relative to the curve, and easy to place — and on clear containers the unlabeled sides become a product window.
There's no universally right answer; it's a trade between billboard area, application forgiveness, and the number of labels per unit. What matters for sizing is deciding this before the dieline is cut, because each option is a different die.
Curved and tapered surfaces
A flat label only applies cleanly to a surface that is flat in at least one direction. A straight cylinder qualifies — the label bends around it in one axis and lies flat. Two situations break that rule:
- Compound curves. Shoulders, domes, and ball-shaped containers curve in two directions at once. A flat label physically cannot conform to them and will wrinkle, flag, or lift at the edges. The fix is to keep the label on the straight wall, or shrink it until the curvature across the label is negligible.
- Tapered walls. Many tubs, cups, and some candle vessels are slightly conical — wider at the top than the bottom. Wrap a straight rectangular label around a taper and it must spiral: level at the front and visibly climbing or wrinkling by the ends. The fix is a tapered dieline: the label is die-cut as a curved arc (a section of an annulus) that looks bowed when flat but sits level once wrapped around the cone. Tapered labels need their own die and their own artwork distortion — the design must be built on the arc, not on a rectangle — which is why taper is a "flag it early" property, not a production afterthought.
A useful habit: the smaller the container's diameter and the taller the label, the harder every one of these effects bites. A short label on a large jar is forgiving; a tall label on a narrow bottle magnifies taper, skew, and edge-lift all at once. Material choice interacts with curvature too — thin films conform better than stiff papers on tight radii.
Orientation, shape, and corner radius
Two labels with identical dimensions can still be different labels. Orientation — whether the design runs along or across the web, and where the roll's edge sits relative to the copy — is specified separately from size, as an unwind position. Shape is a die decision: rectangles, squares, circles, and ovals in common sizes often already exist in a converter's die library, which can shave setup time and tooling from the first order, while a custom shape means cutting a new die (or running a digital cutter). This is also where the choice between cutting completely through the liner or only through the face stock comes in — see die-cut vs kiss-cut labels for that distinction.
Rounded corners deserve a special mention: pressure-sensitive labels almost always carry a small corner radius — 1/8 in is a typical default — because square corners are where automatic application snags and where lifting starts in the field. If your artwork assumes perfectly sharp corners, expect the die to round them slightly.
Label size and press cost
Size is also a cost lever, and the mechanics are simple even though the numbers vary by converter. Labels are printed in multiple lanes across a web and repeated along it; your label's dimensions determine how many fit into each revolution of the press. A bigger label means fewer labels across the web, fewer per foot of material, and therefore more substrate and press time per thousand labels. Small size reductions that let an extra lane fit across the web can improve the economics disproportionately — while an odd dimension that strands unusable material at the web edge does the opposite. None of this should drive the design decision on its own, but when two candidate sizes both fit the container, the smaller (or better-nesting) one is usually the cheaper one to run.
How PackOS sizes labels
PackOS treats label sizing as a geometry problem it can solve for you. Upload existing label artwork and it detects the die shape, measures the true dimensions and corner radius, and rebuilds the dieline as a parametric model — so resizing for a new container is a dimension change, not a redraw. Give it container measurements instead and it derives the wrap: circumference from diameter, seam gap, safe height on the straight wall, and a tapered arc when the container calls for one. The same detected geometry feeds the photoreal 3D proof — your label shown on the container, seam and all — and the instant quote. You can see how the reconstruction works on the technology page, or size a real label now with Quick Quote.
Frequently asked questions
What is the most common label size?
There is no single standard, but the most widespread individual size is the 4 x 6 inch shipping label, because thermal printers and carrier systems standardized around it. For product labels, common families include 2 to 3 inch circles for jar lids and wraps sized from the container's circumference.
How do I measure a jar for a wrap label?
Measure the diameter and multiply by pi (about 3.1416) to get the circumference, or wrap a flexible tape around the jar to measure it directly. Then subtract a small gap — roughly 1/8 to 1/4 inch is typical — so the label ends don't collide. Label height comes from the straight, vertical portion of the wall.
Should a wrap label overlap or leave a gap?
Either works, but decide deliberately. A gap of roughly 1/8 to 1/4 inch is the more forgiving choice because it absorbs application tolerance. A deliberate overlap is common on tamper bands and some full wraps — just keep the zone under the overlapping end clear of critical artwork.
Can I put a straight label on a tapered container?
Not cleanly. A rectangular label wrapped around a cone must spiral, so it wrinkles or climbs by the ends. Tapered containers need a tapered dieline — the label is cut as a curved arc that looks bowed when flat but sits level once applied — with the artwork built on that arc.
Does a bigger label cost more to print?
Generally yes, beyond the extra material itself. Labels print in lanes across a web, so a bigger label means fewer labels per revolution of the press — more substrate and press time per thousand. When two sizes both fit the container, the smaller or better-nesting one is usually cheaper to run.