
Handing off packaging artwork to a printer, cleanly
You've finished the artwork, the deadline is close, and the printer asks you to "send print-ready files." What they actually mean is a short, specific list — and getting it right is the cheapest way to keep your launch on schedule.
THE SHORT ANSWER
A clean handoff is a print-ready file plus everything the printer needs to run it without asking questions: the correct production dieline on its own layer, artwork built to bleed and safety, color built to its intended process, fonts and images handled properly, and a filled spec sheet. Get those right and proofing is fast and the first run is correct. Miss one and the job stalls in email while the schedule slips. The essentials:
- Dieline — the production die on its own layer, not merged into the art
- Bleed & safety — background extended past the cut, critical content pulled in
- Color intent — process versus spot decided and named, not left ambiguous
- Fonts & links — embedded or outlined, images at print resolution
- A filled spec — dimensions, material, quantities, decoration, and a named contact
What a clean handoff actually means
The handoff is the moment your finished artwork leaves your hands and becomes a manufacturing input. On paper it looks trivial — attach a file, hit send. In practice it is the single most common place a packaging project loses days, because a printer cannot start until the file is complete, correct, and unambiguous. Everything they do next — preflight, proofing, tooling, plating, scheduling the press — inherits whatever you sent. A gap at the handoff doesn't stay small; it propagates all the way to the run.
"Print-ready" is not a vibe; it is a checklist. When a printer asks for print-ready files they mean a file that passes preflight — the automated check that confirms the artwork is physically producible on their equipment. A clean handoff is simply one that passes that check on the first try, with nothing left for a coordinator to chase down. This is one stage in our guide to sourcing and buying packaging, and it is the stage you control most directly: the design is done, the supplier is chosen, and now the only variable is whether the package you send is complete.
What the printer actually needs
Strip away the file-format debates and the real requirements are short and consistent across converters. Listed in roughly the order they cause problems when they're missing:
- A production-ready dieline on its own layer. The cut, crease, and bleed paths must be live vectors on a named layer or spot separation the printer can isolate — never flattened into the artwork. If you're unsure what that means, start with what a dieline is.
- Artwork built to bleed and safety. Background art extends past the cut so trimming never leaves a white sliver; critical copy, logos, and barcodes stay inside the safety margin so they aren't trimmed off or folded through.
- Fonts embedded or outlined, images linked at resolution. No missing fonts, no low-resolution placed images. Type is either embedded in the file or converted to outlines; raster images are supplied at print resolution.
- Color built to its intended process, spots named as spots. Decide process (CMYK) versus spot color deliberately, and name each spot exactly. A brand color that must match should be a named spot, not an unnamed swatch or an RGB build the printer has to interpret.
- A filled spec sheet. Dimensions, material or substrate, quantities and tiers, decoration and finishes, and any compliance requirements — the written description the file is checked against.
- A named contact for proofs. One person who can answer a question and approve the proof, so a small query doesn't sit unanswered for days.
Here's the same list as a checklist you can run before you send, with the fastest way to verify each item:
| What to include | Why it matters | How to check |
|---|---|---|
| Production dieline on its own layer | The die-maker extracts the cut/crease path from it | Toggle layers — the die must isolate cleanly from the art |
| Bleed & safety | Prevents white edges and trimmed-off copy | Confirm background runs past the cut; copy sits inside the margin |
| Fonts embedded or outlined | Prevents type reflowing or dropping on the printer's system | Package the file, or run preflight for missing-font flags |
| Images at print resolution | Prevents soft or pixelated printed art | Check effective resolution of every placed image (~300 dpi typical) |
| Color intent set, spots named | Prevents wrong builds and surprise separations | Open the separations preview; clear stray RGB and unnamed spots |
| Filled spec sheet | Gives the printer the written truth to check the file against | Every field completed — no "TBD" on dimensions or material |
Start with the dieline
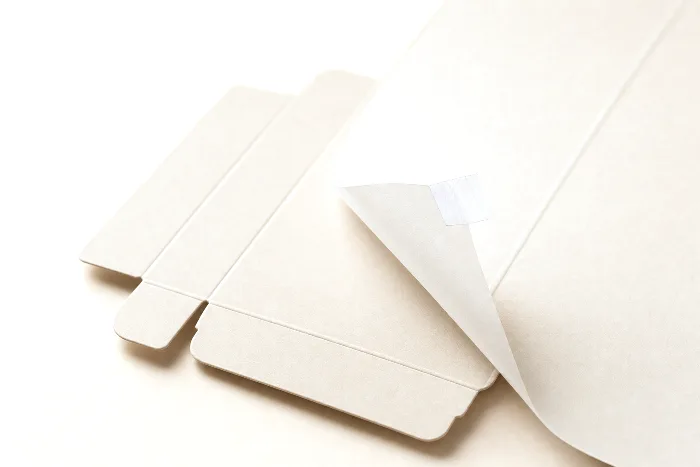
Most handoff failures trace back to the dieline. The single rule that prevents them: the artwork is built on top of the supplied dieline, locked in place, while the dieline stays as editable vectors on its own layer. Don't rasterize it, don't merge it into a background, and don't rebuild it by eye from a flat PDF someone emailed you — use the exact die the printer supplied, or the one your file was structured from.
Why it matters so much: the converter builds a physical steel die from those paths. If cut and crease live on the same layer as the art, the die-maker can't reliably separate the tool path from the graphics, and someone has to send the file back or, worse, guess. If the dieline is flattened into pixels, the path can't be extracted at all. Keep the structure and the skin as separate layers of one file and this whole class of problem disappears. Then confirm the artwork actually maps to the finished folds — a panel that reads upside-down on the flat can be perfectly right once the carton is glued, and only the dieline tells you which way each panel faces.
Preflight before you send
The cheapest fix is the one you make before the file leaves your desk. Preflight is the automated pass that catches missing bleed, low-resolution links, absent fonts, and stray color spaces — the exact issues that get files bounced. Run it yourself rather than discovering the problems in the printer's queue a few days later. Our packaging preflight checklist walks through what a converter checks and how to clear each flag.
Package the file as a print-ready PDF — usually a PDF/X flavor — with the correct output intent embedded, or supply a properly collected native file with all links and fonts. If you're not sure how to export it, our guide to a print-ready PDF for packaging covers the settings that matter. Two details do more damage than any others: image resolution that looks fine on screen but prints soft, and spot versus process color left undecided so the printer has to interpret your intent. Settle both before you send. If a brand color has to match across every SKU, treat it as a managed spot and say so — color management only works when intent is explicit, never when it's inferred.
Fill the spec, and name a contact
A file without a spec is a picture without instructions. The spec sheet is the written description the printer checks the artwork against and quotes from: exact dimensions, the material or substrate, quantities and any tier breaks, decoration and finishes, and any compliance or regulatory requirements. When the file and the spec agree, preflight is a formality; when they disagree, someone has to reconcile them — and that someone will email you.
Build it once and reuse it. Our spec-sheet builder assembles a complete, comparable spec so nothing is left blank, which also makes your quotes apples-to-apples across suppliers — the same discipline that makes a good packaging RFQ work. Finally, name a real person as the proof contact. Most back-and-forth isn't caused by a hard problem; it's caused by an easy question with no one available to answer it.
Why a clean handoff protects your timeline
Tooling and proofing usually dominate the front of a packaging schedule, and both of them wait on the file. A file that preflights cleanly moves straight into proofing and die-making; a file with a missing font or a merged dieline triggers a correction cycle — the printer flags it, you fix it, you resend, they re-preflight — and every one of those loops pushes the stages behind it. The corrections themselves are quick; the waiting between them is what actually costs you.
How much time a clean handoff saves varies by printer, process, and season — there's no fixed number, and anyone who quotes you one is guessing. What's reliable is the direction: fewer corrections at the handoff means fewer delays downstream. Plan backward from your in-market date with real ranges rather than a single figure — our guide to packaging lead times and the editable timeline planner let you model the stages for your own job instead of trusting an internet average.
Then review the proof deliberately
A clean handoff earns you a fast proof — don't waste it with a rushed approval. The proof is your last checkpoint before tooling and press time are committed, and approving it is a decision, not a rubber stamp. Read every word of copy, scan the barcode, confirm the dieline placement and panel orientation, and evaluate color against the right reference rather than whatever monitor happens to be in front of you.
Decide up front whether a digital proof is enough or the job warrants a physical or press proof. A PDF proof confirms layout, copy, and structure; color-critical brand work and brand-new structures usually justify approving real material and real color instead of a screen simulation. Work through it methodically with a proof approval checklist so nothing gets waved through — the whole point of a clean handoff is to reach this step with attention to spare.
How PackOS makes the handoff clean
PackOS is built to take the guesswork out of this exact moment. Upload artwork or a die file and it detects the structure, separates the cut, crease, and bleed lines, and rebuilds an editable, parametric dieline — so the die is on its own layer by construction, not by luck. It preflights the file the way a converter would, flags the resolution, color, and separation issues before they reach a printer's queue, and produces a filled spec and a photoreal proof from the same understanding. You can see the detection and quality checks on the technology page, or run your own file through Quick Quote and hand off with confidence.
Frequently asked questions
What files does a printer need to run a packaging job?
A printer generally needs a print-ready PDF or collected native file that includes the production dieline on its own layer, artwork built to bleed and safety, fonts embedded or outlined, images linked at print resolution, color built to the intended process with spot colors named as spots, and a filled spec sheet. A named contact for proof questions completes it.
Should fonts be outlined or embedded when I send artwork?
Either works as long as it is done consistently. Embedding keeps text editable and preserves small type, while outlining converts type to vector shapes so no font file is needed but the text can no longer be edited. Outline anything decorative or unusual, and confirm your printer's preference before you send.
What is the most common reason a print file gets bounced?
Missing bleed and low-resolution linked images are the most common reasons a packaging file is sent back. Close behind are dielines merged into the artwork instead of kept on their own layer, RGB or unnamed spot colors, and missing fonts. A preflight check catches all of these before the file leaves your hands.
Do I need a physical proof, or is a digital proof enough?
It depends on the risk. A digital or PDF proof is enough to confirm layout, copy, and dieline placement, but color-critical brand work and brand-new structures usually justify a physical or press proof so you approve real material and real color instead of a screen simulation.
How does a clean handoff affect lead time?
A clean handoff protects the front of the schedule. Files that preflight cleanly move into proofing and tooling without a round of corrections, while missing elements trigger back-and-forth that can push every downstream stage. The exact time saved varies by printer, process, and season, so plan with real ranges rather than a fixed number.