
Induction seal vs heat seal: two different jobs
"Induction seal" and "heat seal" get used interchangeably on packaging specs, but they are two different processes that do two different jobs — one bonds a foil liner to a rigid container, the other welds a flexible film shut. Confusing them is a fast way to end up with the wrong package.
THE SHORT ANSWER
Induction seal vs heat seal comes down to the package: induction bonds foil to a rigid rim; heat seal welds two flexible films. An induction seal uses electromagnetic energy to fuse a foil liner to the mouth of a jar or bottle after the cap is applied — a tamper-evidence and freshness seal for rigid containers. A heat seal presses two layers of film between hot jaws until their sealant layers melt together — how pouches are closed and trays are lidded. Same word, "seal," but different physics for different packages.
- Induction seal — a foil liner is heated by an electromagnetic field and bonds to a rigid rim through the cap
- Heat seal — a hot bar or jaw melts the sealant layers of two flexible films together
- They are not interchangeable: induction needs a rigid land to seal against; heat sealing needs two film surfaces
- Both give tamper evidence, but prove it differently — a bonded foil membrane versus a welded seam
How an induction seal works
An induction seal is a foil membrane bonded across the mouth of a rigid container. It starts as a liner tucked inside the cap. On a common two-piece liner, that stack is, from the top down: a pulpboard backing, a wax layer, a thin aluminum foil, and a polymer heat-seal coating on the underside. One-piece foam-backed liners do the same job with a different construction. The container is filled, the foil-lined cap is torqued on, and the closed package passes under an induction sealing head.
The head generates a rapidly alternating electromagnetic field. That field induces eddy currents in the aluminum foil — and only in the foil — so the foil heats up while the cap and the product stay comparatively cool. The heat does two things: it melts the polymer coating on the underside of the foil so it welds to the container's land (the flat top surface of the rim), and, on a two-piece liner, it melts the wax so the pulpboard releases the foil. When the cap is later removed, the foil stays bonded to the container and the backing stays in the cap. The result is a hermetic foil membrane the consumer has to peel or pierce.
Two properties make induction sealing distinctive. It is non-contact — nothing touches the seal area — and it happens after capping, sealing right through the closure. In return, it has requirements: there must be a foil layer in the liner, and the container material has to be one the coating is formulated to bond to (foil liners are specified for resins such as PET, HDPE, and PP, or for glass, each with a matched coating). Get the liner-to-resin pairing wrong and the seal simply will not stick.
Induction seal — a foil liner bonded to a rigid container's rim by electromagnetic heat applied after the cap is on, forming a tamper-evident, hermetic membrane. See more terms in the packaging glossary.
How a heat seal works
A heat seal welds two thermoplastic surfaces together with heat and pressure. Every heat-sealable film carries an inner sealant layer — often a polyethylene such as LDPE or LLDPE, or a cast/peelable sealant — engineered to melt at a lower temperature than the structural and barrier layers above it. Bring two of those sealant faces together, apply a hot bar or jaw, and three variables do the work: temperature, pressure, and dwell (the time the jaws stay closed). The sealant melts, the two films flow into one another, and on cooling they solidify into a continuous weld.
Heat sealing shows up everywhere flexible packaging is made. The side and bottom seals of a stand-up pouch are heat seals; so is the top seal added after the pouch is filled, the closure on a sachet or stick pack, the lidding film welded to a yogurt cup or tray, and the long back seam on flow-wrapped bars. That back seam is itself a design choice — a fin seal versus a lap seal — which changes how the film folds and how much material the seam uses. The one non-negotiable is that both mating surfaces need a compatible sealant; you cannot heat seal a film to a substrate its sealant was not designed to bond to, which is a frequent root cause when a seam looks welded but pulls apart.
Heat sealing is a core building block of most flexible packaging formats, and getting its three parameters in balance is what separates a package that survives shipping from one that fails on the shelf.
Induction seal vs heat seal, side by side
The two seals answer different questions. Induction sealing asks, "How do I close and protect a rigid container after it is capped?" Heat sealing asks, "How do I join two flexible surfaces into a package in the first place?" This table lines up the practical differences.
| Aspect | Induction seal | Heat seal |
|---|---|---|
| What it bonds | A foil liner to a rigid container rim | Two flexible films (or a film to a tray flange) to each other |
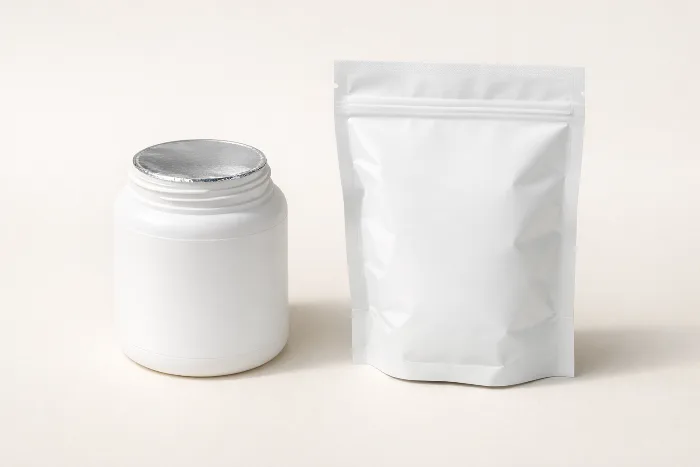
| Package type | Rigid jars, bottles, tubs | Pouches, sachets, bags, lidded trays |
| Heat source | Electromagnetic induction — non-contact, through the closed cap | Direct contact with a hot bar, jaw, or impulse wire |
| When in the line | After the cap is applied | During forming, filling, or closing the package |
| What it requires | A foil layer in the liner plus a compatible land and resin | A heat-sealable sealant layer on both mating surfaces |
| Tamper evidence | A bonded foil membrane you must peel or pierce | A welded seam, often peelable or opened at a tear notch |
| Reseal | Via the threaded cap once the foil is removed | Only if a separate zipper or press-to-close is added |
Notice they are not competitors so much as tools for different structures. A rigid bottle of supplements is induction sealed; a coffee pouch is heat sealed. And plenty of products use both — more on that next.
Where each seal is used
Match the seal to the package, not the other way around. As a rough guide:
- Induction seals show up on rigid containers where a barrier and a first-open indicator matter: supplement and vitamin bottles, sauce and condiment jars, lotions and cosmetics, household and industrial chemicals, and some beverages. Anywhere a screw or snap cap sits on a flat rim is a candidate.
- Heat seals close flexible packages: coffee, snack, jerky, and tea pouches, single-serve sachets and stick packs, lidded cups and trays, and flow-wrapped bars. If the package is made of film, it is almost certainly heat sealed somewhere.
The two are not mutually exclusive. A rigid bottle can carry an induction foil and a shrink band for a second tamper cue. A carton can hold a heat-sealed inner pouch. Understanding the whole caps and closures stack — liner, cap, band, and how the closure meets the container — is what keeps those layers working together rather than fighting each other.
Tamper evidence and freshness
Both seals double as tamper evidence, which is a large part of why they exist. An induction foil is a bonded membrane: to reach the product, someone has to visibly peel or puncture it, and a foil that is already loose, torn, or missing signals interference. It also does real barrier work, slowing oxygen and moisture ingress and holding back leaks in transit. A heat seal is tamper-evident because opening it means tearing or cutting a continuous weld — designers reinforce the cue with tear notches, peelable seals, and printed "sealed for your protection" copy. For a deeper look at how these first-open features are engineered, see our guide to tamper-evident packaging.
Tamper-evidence requirements for regulated products — over-the-counter drugs and certain foods, for example — are set by authorities such as the U.S. Food and Drug Administration, and the applicable standards and test methods change over time. This article is general engineering guidance, not legal or regulatory advice; confirm the current requirements for your product and market directly with the relevant authority before you finalize a seal.
How each seal fails (and how to tell)
Both seals fail in recognizable ways, and the tells point straight at the cause. Diagnosing a bad seal is mostly a process of ruling out the usual suspects.
| Seal | Common failure | Likely cause |
|---|---|---|
| Induction | Foil will not adhere / partial bond | Liner coating not matched to the container resin, or the land is uneven |
| Induction | Channel leak across the rim | Contamination or product on the sealing land, or a cocked / under-torqued cap |
| Induction | Weak or over-cooked seal | Too little energy or too much line speed, or too much power scorching the foil |
| Heat | Weak seal that peels open | Temperature, pressure, or dwell too low for the film |
| Heat | Channel leak or contamination in the seam | Product, powder, or oil trapped in the seal area |
| Heat | Wrinkles, burn-through, or brittle seals | Jaw misalignment, too much heat, or an incompatible sealant |
Flexible-package seal failures have their own deep dive — see why pouch seals fail for the full breakdown, including how delamination can masquerade as a seal problem. If you are staring at a defect and cannot place it, our packaging symptom checker walks you through the likely causes by symptom. And catching many of these before the run is exactly what a preflight checklist is for.
How PackOS handles seals on your spec
Seals are a spec decision, and PackOS treats them as one. When you upload artwork, a die file, or a previous spec, it detects the structure — rigid container versus flexible pouch, closure and liner versus welded seam — and carries the sealing method through to the quote, because the seal drives tooling, materials, and the production route. You can watch that structure detection run on the design technology page. This piece is part of our broader guide to packaging design, which connects dielines, closures, materials, and print into one workflow. When you want your seal choices written down cleanly for a converter, the spec sheet builder assembles a converter-ready spec with live checks — or you can skip straight to a number with Quick Quote.
Frequently asked questions
Is an induction seal the same as a heat seal?
No. An induction seal bonds a foil liner to a rigid container's rim using electromagnetic energy after the cap is applied, while a heat seal welds two flexible films together with a heated bar or jaw. They are different processes for different packages — induction for jars and bottles, heat sealing for pouches, sachets, and lidded trays.
Does induction sealing use heat?
Yes, but indirectly. The induction head never touches the package; it creates an alternating electromagnetic field that heats the aluminum foil in the cap liner by induction. That heat melts a polymer coating on the underside of the foil, which bonds to the container rim. Because the heat is generated only in the foil, the process seals through the closed cap.
Can you induction seal a pouch, or heat seal a jar?
Generally no. Induction sealing needs a rigid, flat land to press the foil against and a foil-lined closure, so it suits jars, bottles, and tubs rather than a flexible pouch. Heat sealing needs two heat-sealable film surfaces to weld together, so it closes pouches and lids trays but cannot seal a rigid container mouth on its own.
Which seal is tamper-evident?
Both can be. An induction foil forms a bonded membrane the consumer must peel or pierce, which is a clear first-open indicator and also a barrier seal. A heat seal is tamper-evident because the welded seam has to be torn or cut to open, often with a tear notch or peelable feature. Tamper-evidence requirements for regulated products are set by authorities such as the FDA — confirm the current rules with them.
Why won't my induction seal stick?
The most common causes are a container material the liner's coating is not made to bond to, too little energy or too much line speed at the sealing head, product or dust contaminating the rim, or a cocked or under-torqued cap. Match the liner to the resin, clean the land, and dial in the sealing head — or run the defect past a symptom checker to narrow it down.